Today we’re taking a step away from the regular www.aminorjourney.com posts and looking at a personal project of mine – Velma, the Plug in Prius.
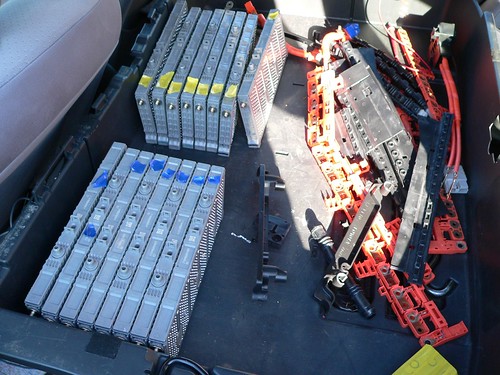
This weekend the weather has been nice enough to finally take the additional Prius battery packs which have been sitting in Velma’s luggage area and taking up valuable space.
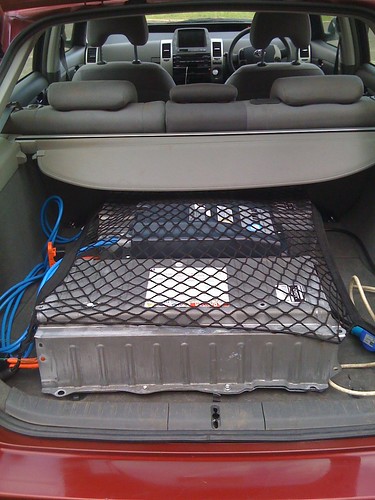
Obviously the above arrangement isn’t great in anyone’s eyes. We need to figure out a more secure and permanent way of storing the two additional Prius batteries.
Read on after the jump to see the new battery arrangement take place.
The original battery pack from a Prius is designed to sit under the rear luggage load area, just behind the rear seat. The large under-trunk area next to this houses the spare wheel and a small sub-trunk luggage space. It would be possible to fit a single additional Prius battery pack in it’s original case in this space. Sadly for most PHEV prius conversion projects using a multiple Prius battery packs more than two batteries are needed for any decent increase in electric-only range and fuel economy.
In Velma, we’ve decided so far to use two additional battery packs in addition to the original Prius battery. You can see some of the information about how we electrically joined up the additional packs here. Needless to say, you shouldn’t go ahead with any project like this unless you understand the implications and dangers of working on a high-voltage prius system.
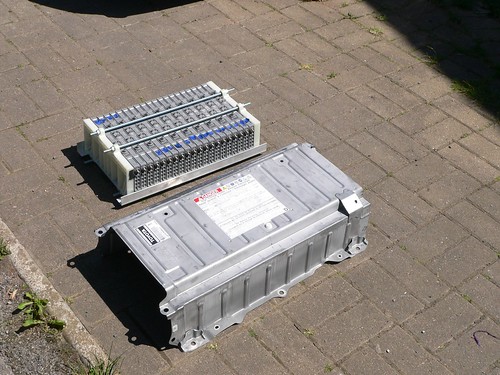
Our two additional battery packs each contain 28 battery modules, which are comprised of six NiMH battery cells per module. That gives us 56 battery modules to find a home for.
By removing the cells from the original battery casing and creating new battery packs it’s possible to fit 56 modules in the under-trunk area.
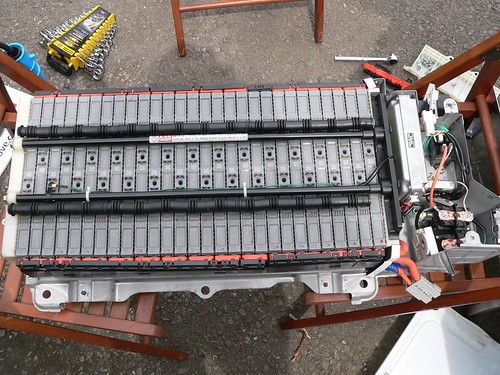
Firstly, we’ve taken the top off a pack (still in it’s original case). Note the modified cable exiting on the right of the picture. This Is the Anderson connector used while I was testing the two batteries for the past few months before making a permanent installation of the batteries under the trunk.
After carefully taking battery modules out of the case my friend Adam (remember his City Stromer?) helped cut and drill some angle aluminum for the mounting of the shortened battery packs. Each battery module snaps to the next and is 20mm wide. The holes are drilled every 40 mm, alternating on each side. In other words, a pair of battery modules are supported by two bolts, one on each side. The more batteries mounted together, the stronger the pack is mechanically.

We chose to make two smaller physical battery packs, each made of 20 modules. The third battery pack will only contain 16 cells with a wooden divider in the middle. The third pack will be split in the middle. The third pack will have eight modules at each end, electrically split from the other and connected in series with one of the 20 module packs, reconstructing the two, 28 module packs electrically.
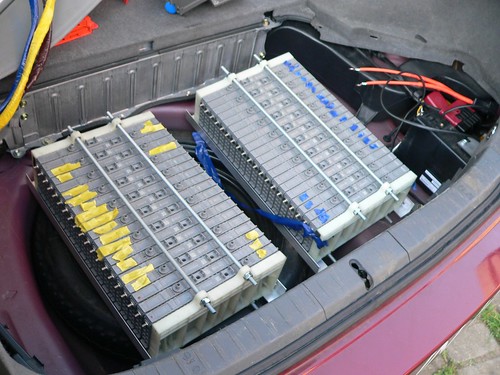
Here’s pack 1a, alongside the original pack 1’s battery cover. The 8mm studding is used to provide end-on compression to prevent the NiMH cells expanding when being used or charged. The plastic end-plates are modified original end plates.
By the end of the day we have two, 28 module packs and enough battery modules left to make the third.
Hopefully by the start of the working week (a day later this week thanks to monday’s holiday) Velma will be operational again with a newly arranged battery pack. Watch this space.
For those who come expecting EV and PHEV news – don’t worry. Normal service will be resumed soon!